หน้าเว็บ

10/19/2553

Red hat for my daughter


Materials:
50 gms Worsted weight cotton yarn
Size US 8 (5mm) circular needles, 16" and set of 4 double point needles or size needed to obtain gauge.
Gauge:
17 sts and 24 rows in 4" square
Sizes 3 mos. (6 mos, 12 mos, 2t-4t).

Pattern:

CO 108 (120, 132, 144). Join in a round being careful not to twist the stitches, place marker to mark beginning of the round. Work lace pattern (below) 2 times, or stop at desired length.Work rounds 1 and 2 one more time.
Lace Pattern:
Rd 1: *(k2tog) 2 times, (M1, k1) 4 times, (ssk) 2 times.Repeat from *around.
Rds 2 -4: Knit even.

Body of Hat
*K3tog, k2tog, k2, ssk, k3tog tbl.Repeat from * around.End number of stitches, 54 (60, 66, 72).
Work Stockinette stitch (knit even) until hat measures 2 (2", 3", 3 ½") not counting brim.
Begin decreases
Place markers every 9 (10, 11, 12) sts, 6 markers total.
*Knit to within 2 sts of the st marker, k2tog, slip marker.Repeat from *around to first marker.
Knit next round even.
Repeat last 2 rounds until 6 sts remain.Cut yarn, draw through sts with a tapestry needle, weave in ends.
Optional Ties
Fold hat in half and mark the halfway points (use a safety pin) where the brim meets the body of the hat.  Pick up 4 sts at one marker and work an I-cord for about 5" .Do the same on the other side.
Stitch Abbreviations:
k = knit
p = purl
tbl = through the back loop
ssk = slip, slip, knit
k2tog = knit 2 together
M1 = Make one (pick up strand between stitches, knit into the back)
yo = yarn over.

10/18/2553

Knitting socks

Knitting socks
Learn all about knitting socks yourself! Resources Sokken breien All about knitting socks (dutch) What will we need? There are many stories about knitting socks and the number of needles before you use. Knitting it would be complicated because of the large amount of needles that you probably should keep track, or it could just knit one of the easier works are due to the possibility of two Soken simultaneously with the stabbing of a row.
One, two, four, five How you use needles for knitting socks, varies from person to person and also depends on the result you desire and the pattern you're following. Some people one or two socks on circular needles knitting, but the most common is the four or five knitting needles. If you're just starting with knitting socks on four or five knitting needles a good idea. This is the way one 'before' and the socks knit in this way is also from generation to generation. If you have mastered, you will find that switching to one or two circulars process easier and you can choose two socks at once knitting, something very nice is if you find annoying after a sock in exactly the same The second way to get started. In this eBook I discuss all the techniques so you can choose which way you prefer to use.
Choosing your yarn
No shortage of supply - but what yarn to choose?
Thickness and volume Most patterns for knitting socks are designed for four yarn. This is a nice yarn to work with and is of medium thickness socks and warm as a result. You can get them in shoes but also attract indoors to keep your feet warm. Thinner socks can be made by using three-ply yarn. Here, you or thinner needles that are two sizes to use. There is also 5 cm in width for each additional one stitch is needed. There may also be used thicker yarn, for example bed socks or socks in winter. It must then be knit a size bigger needles and there is a stitch for every 5 cm less necessary. Socks for boots are best with sportwol are knitted on needles No. 4. There are 5 cm each. 2 stabbing anymore. Ultimately it is the most fun to keep experimenting with the type of yarn you use for your socks and it is also fine wool, for example, leftover or recycled (eg extracted from old sweaters that you no longer use) thread to use. It is important however to keep an eye on what needles you used and the stabbing are needed. Well, again, practice makes perfect, and trying out the different threads can be very instructive.
Type For socks, it is always advisable to use natural yarn. Synthetic yarns are quick sweat and absorbs very little moisture. The sweat of your feet can not go anywhere this way, resulting in an unpleasant, sticky feeling and an unpleasant odor. When knitting with cotton yarn is a good idea to knit a size bigger, as it has to shrink. Caddis are still the most used. This type is elastic and keeps its shape and retains heat well not be sweaty.
How much yarn do I need? The amount of yarn needed to knit socks, depending on the use pattern stitch. For socks in rib is more necessary than wool socks in stockinette stitch. They fit better because a rib elastic knitting provides. Also socks whose edges must be broken of course ask for more sock yarn than where this is not the case. The required length of the sock yarn will also determine the required amount. For a knee-high without board turned around half more yarn than an ankle length sock with folded board. Knitting the socks The sock in stages
If you have decided what yarn you will use and what pattern you follow, it's time to get started with knitting the socks. To get you help and keep things simple, we have a sock in several parts divided. The picture below are the different stages of the sock knitting indicated. These designations refer to the next chapters, in which different parts are explained step by step based on the establishment of four needles.
Five needles in total The explanation on the following pages is formed by using five short needles (sometimes called needle socks).
The structure
Okay, let's get to work! After you've searched in the size measurement table, put the number of stabbing that this is indicated on a needle and knit a row rib. Arrange on 4 needles. Note that you do not twist the needles before you begin to knit in the round and pay attention to where you left off. To prevent this you can first one or two knitting two rows and then the stabbing divided between the four needles.
Continue with the first two quarter needle stabbing of a needle. This ensures that the fully closed and the design can be finalized. After you go straight, the beginning of the forming board.

Referance : Sokken breien

Sokken breien is a professional on knitting socks since 2001.

10/16/2553

How to Read a Knitting Pattern

originated by:Sondra C, Anonymous, Mary Palatucci, Travis Derouin (see all)
 
Once you decide exactly what you want to knit, whether it's a sweater for new baby, or a scarf to keep her warm in the winter, the first thing that you must get is a pattern. To a knitter, a pattern is what a map is to an explorer. It is a guide that helps you follow the design, the size, the needles and the stitches needed. But to a beginner, it may seem like a confusing code. By learning what the terms and abbreviations mean, however, you'll soon become comfortable with reading knitting patterns and you'll be able to knit anything you can find a pattern for.

Steps

     1. Choose a yarn similar to the yarn recommended in the knitting pattern. Always buy enough yarn and an extra ball or two at the same time, so you get all the yarn from the same dye lot. If you end up needing more yarn, the next dye lot could be a slightly different color because of manufacturing variations, even it has the same name and color on the tag.
      
     2. Choose knitting needles based on the pattern's recommendations. Needle sizes vary, from tiny (000) to huge (30), and your pattern will tell you the best size needle to use, but this recommendation should be treated as a guide only. Your knitted gauge swatch will tell you if you need to use a different size needle than the one your pattern recommends. That's why it's always good to save the needles, as they can last a lifetime. Eventually, if you knit long enough, you will end up with a variety of sizes that you will need.
     
     3. Make a gauge swatch before you start knitting your garment to ensure the needle size and the yarn chosen will produce the size and shape garment you need. In the pattern, the gauge is given as the number of stitches and rows that the designer intends you to have, over a 4-inch square. The pattern usually specifies what kind of stitch to use (often it is the same stitch pattern as will be used throughout the project). This is extremely important to assure that the finished product will be the size that the pattern intended it to be.
  • For the purposes of this article, you should cast on the number of stitches the designer intends you to have within four inches, plus six stitches extra, so that you can have a three-stitch garter stitch border on each side. This will prevent the swatch from curling, and will nicely frame the area you will want to measure. Some knitters swatch differently.
  • Pay attention to whether the gauge measurement is intended for pre-washed or post-washed, post-blocked fabric. Some yarns can change gauge drastically when washed. Wash the swatch the same way you intend to wash the finished item. 
     4. Measure the gauge swatch with a ruler. Hold or pin it down flat--don't stretch it  or scrunch it. The area between the garter stitch border should measure four inches by four inches. There should be no need to count the stitches, as you counted them when you cast on. If you've swatched in a different way, and thus do need to count your stitches, be aware that the stitches in stockinette stitch are shaped like little v's. Count the v's across for stitches, and the v's up and down for rows.
  • If the size of the swatch does not match what the pattern specifies, you will probably need to experiment with different needle sizes. If you need more stitches or rows per inch, use smaller needles. If you need less, use bigger needles. Every time you try a new set of needles, knit a new gauge swatch to test them. You can also adjust your gauge by changing the type of yarn you use (thinner yarn if you need more stitches or rows, thicker yarn if you need less) but this is usually inconvenient and should not be necessary if you purchased yarn similar to what was recommended.
  • This step can be skipped if you're knitting a simple scarf or blanket.
     5. Follow the row by row instructions. It is helpful to check off a row as you are finished. It is also a good idea to place a ruler under each row, so that your eye follows the exact row, and not one above or below. This is extremely important especially when you start adding colors, or designs that need exact counting.  
     
     6. Recognize a stitch for each letter, followed by the number indicating how many of that stitch is called for. The letter P stands for purl and the letter K is for knit. If your pattern says Row One: P5, K5, you should purl five stitches and then knit five stitches on your first row. Learning to do the knit and purl stitches will enable you to also do more intricate designs. These two stitches are the basic steps used in many patterns. Read the next section to familiarize yourself with other commonly used abbreviations.

     7. Repeat any instructions when you see asterisks, brackets, or when the pattern says "X times".


  • Example 1: *P1, K1 tells you to purl one stitch, knit one stitch, and again purl one stitch and knit one stitch. This may also be written as [P1, K1]2x
  • Example 2: K2, * p8, k4, rep from * tells you to knit two stitches, purl 8, knit 4, and than keep purling 8 then knitting 4 until you get to the end of the row.
     8. Use the corresponding key to interpret chart instructions, in which the rows and stitches are laid out visually. The pattern tells you what each symbol in the chart means. These symbols differ from pattern to pattern but don't worry, as nearly every knitting pattern will provide you with a glossary of symbols and abbreviations to help you read them easily.

Commonly Used Abbreviations

  • cc - contrasting color; if you're working with several colors, you might see cc1, cc2, etc.
  • m1 - make one stitch; used to make an increase
  • mc - main color
  • rs - right side; the side of the garment that people will see
  • sl - slip a stitch
  • St st - stockinette stitch; you knit one row, purl the next row, and repeat (or, if you are knitting in the round, knit every round)
  • k2tog - knit two together; in other words, put your working needle through two stitches instead of one, and knit them together as though they were one stitch, making a decrease
  • ws - wrong side; the side of the garment that is not intended to be seen
  • yo - yarn over; used to make an increase with a lacy hole

10/15/2553

How to Make a Bodywarmer by kerry

This is a shawl knitting pattern that you can use in a thousand different ways.

You can choose to wear it as a scarf, drape it around your head and over your head, or simply wrap it around your shoulders. This scarf is warm and stretchy and you'll discover that you'll want to wear it all the time. Because of the stretch, it can be a great gift for a person whose size you're unsure of.

You'll need:

1. 200 yards of 2 bulky and textured yarns (or you can go for 2 various medium weight yarns)

2. Size 15 and 40 inch circular needles

3. Tapestry needle or crochet hook

4. Scissors

Gauge: 12 rows and 12 stitches to make a 4 and a half inch square

Size: The finished piece is about 9 inches long and 44 inches around.

The material has a lot of stretch and can work for most people.

This is a simple pattern that can easily be altered in terms of size.

Let's start!

1. Begin by casting on 116 stitches using the long tail cast on stitch. Do this while holding both yarn strands together. The long tail cast on stitch will make your stitch stretchy yet structured looking.

2. Join in round (circular knitting). Make sure not to twist the stitches.

3. Knit in knit two, purl two ribbing for pattern.

4. Continue working in this pattern for 9 inches or until you achieve your desired length.

5. Bind off loosely.

6. Cut the yarn while leaving a few inches for tail.

7. With a crochet hook, weave in ends. Thanks for your reading!

Article source ; www.gyfashion.com
:This is a shawl knitting pattern that you can use in a thousand different ways. You can choose to wear it as a scarf, drape it around your head and over your head, or simply wrap it around your shoulders. This scarf is warm and stretchy and you'll discover that you'll want to wear it all the time. Because of the stretch, it can be a great gift for a person whose size you're unsure of.

Lace Knitting by hi joiney

Technique

Lace scarf during blocking

A hole can be introduced into a knitted fabric by pairing a yarn-over stitch with a nearby (usually adjacent) decrease. If the decrease precedes the yarn-over, it typically slants right as seen from the right side (e.g., k2tog, not k2tog tbl; see knitting abbreviations). If the decrease follows the yarn-over, it typically slants left as seen from the right side (e.g., k2tog tbl or ssk, not k2tog). These slants pull the fabric away from the yarn-over, opening up the hole.

Pairing a yarn-over with a decrease keeps the stitch count constant. Many beautiful patterns separate the yarn-over and decrease stitches, e.g., k2tog, k5, yo. Separating the yarn-over from its decrease "tilts" all the intervening stitches towards the decrease. The tilt may form part of the design, e.g., mimicking the veins in a leaf.

There are few constraints on positioning the holes, so practically any picture or pattern can be outlined with holes; common motifs include leaves, rosettes, ferns and flowers. To design a simple lace motif, a knitter can draw its lines on a piece of knitting graph paper; right-slanting lines should be produced with "k2tog, yo" stitch-pairs (as seen on the right side) whereas left-slanting lines should be produced with "yo, k2tog tbl" (or, equivalently, "yo, ssk" or "yo, skp") stitch pairs (again, as seen on the right side). More sophisticated patterns will change the grain of the fabric to help the design, by separating the yarn-overs and decreases.

Simple examples

A horizontal row of holes can be produced by the pattern: *k3, k2tog, yo, k3*.

A pair of vertical columns can be produced by stacking the pattern: (k, k2tog, yo, k, yo, k2tog tbl, k) on the right side. Here the flanking decreases slant outwards away from the central stitch. For a thicker central column, one can move the decreases so that they slant inwards: (k, yo, dec 2 symmetrically, yo, k). For making the same pattern on the wrong side, the converse stitch patterns are: (p, p2tog, yo, p, yo, p2tog tbl, p) and (p, yo, dec 2 symmetrically, yo, p), respectively.

A diagonal row of holes can be made by shifting the (yo, dec) every row or every other row, e.g.,

Row 1: k, k2tog, yo, k5

Row 3: k3, k2tog, yo, k3

Row 5: k5, k2tog, yo, k1

History and comparison to other laces

Lace knitting is generally not as fine as other forms of lace, such as needle lace or bobbin lace. However, it is better suited for garments, being softer and much faster to produce.

References

(2002) Vogue Knitting: The Ultimate Knitting Book, updated ed., Sixth and Spring Books. ISBN 1-931543-16-X

(1979) Reader's Digest Complete Guide to Needlework, Reader's Digest Association. ISBN 0-89577-059-8

June Hemmons Hiatt (1988) The Principles of Knitting, Simon and Schuster, pp. 92-105. ISBN 0-671-55233-3

Cute knitting picture


10/14/2553

Bitsy Bear


Bitsy is knit using stockinette (knit 1 row, purl 1 row) and garter stitch (knit every row). Clothes are finished with simple crochet stitches: single crochet, double crochet and chain. Pieces are joined using mattress stitch or, if you prefer, backstitch one stitch in from edge. Finished doll is about 9" tall.

Materials:
Knitting worsted:
Bear-3 oz brown
1 snap for back of pinafore
1 bag polyester fiberfil
Panties-1/2 oz white
Pinafore/Headband- 1 oz pink
Knitting needles size 3 or size needed to knit to gauge
Crochet hook size D Note: Use whatever size hook that will allow you to crochet around edges without drawing them up or creating ripples.

Gauge/Tension: 26 stitches= 4 inches

Abbreviations:
K= knit P =purl
tog= together inc= increase ( knit in the front and back of the same stitch)
st= stitch YO= yarn over (yarn forward)
sc= single crochet dc= double crochet
Ch= chain

Bear
Leg: *With brown cast on 15 sts. First row: Increase in every st. (30 sts)
Starting with a purl row, stockinette 7 rows. **
Next row: K 6, K 2 tog 4 times, K to end of row. Next row: Purl
Next row: K6, K 2 tog 2 times, K to end of row. Starting with a purl row, stockinette 15 rows. Put stitches on a spare needle.
Second leg: Repeat instructions from * to **
Next row: K 16, K 2 tog 4 times, K 6. Next row: Purl.
Next row: K 16, K 2 tog 2 times, K 6. Starting with a purl row, stockinette 15 rows.
Next row: Knit across stitches on needle, knit across stitches on spare needle. You should now have both legs on the same needle and 48 stitches. Mark each end of this row with a piece of colored yarn.
Body: Starting with a purl row, stockinette 23 rows.
Decrease for neck: K 2 tog across row. (24 sts) Starting with a purl row, stockinette 3 rows.
Increase for head: Inc in every stitch. (48 sts)
Head: Starting with a purl row, stockinette 23 rows.
Shape top of head:
*K 4, K 2 tog*. Repeat from * to * across row.
Next row: Purl
*K 3, K 2 tog*. Repeat from * to * across row.
Next row: Purl.
*K 2, K 2 tog*. Repeat from * to * across row.
Next row: Purl.
*K 1, K 2 tog*. Repeat from * to * across row.
Next row: Purl
Next row: K 2 tog across row
Cut yarn leaving a long tail. Thread tail through stitches remaining on needle. Pull up tight and fasten off. Match yarn markers and sew back seam to markers leaving a gap for stuffing. Sew inside leg seams.
Fold foot so toes point forward and over sew cast on stitches together. Stuff firmly. Before closing gap in back seam make sure tummy is firm and rounded.
Finish back seam.
Cut a length of brown yarn about 20" long. Starting at back, weave through the stitches of the second row of neck. Pull up tightly to shape neck. Wrap one end of yarn around neck to cover gathering stitches. Again, pull up tightly. Tie yarn ends in knot, trim and bury ends in body.
Ear: With brown cast on 8 stitches.
First row: K 1, inc in next st, K to last 2 sts, inc in next st, K 1.
Next row: Purl.
Next row: K 1, inc in next st, K to last 2 sts, inc in next st, K 1. (12 sts)
Starting with a purl row, stockinette 3 rows.
Nexr row: K 1, K 2 tog, K to last 3 sts, K 2 tog, K 1.
Next row: Purl.
Next row: K 1, K 2 tog, K to last 3 sts, K 2 tog, K 1.
Next row: Purl. (8 sts)
Next row: K 1, inc in next st, K to last 2 sts, inc in next st, K 1.
Next row: Purl.
Next row: K 1, inc in next st, K to last 2 sts, inc in next st, K 1. (12 sts)
Starting with a purl row, stockinette 3 rows.
Next row: K 1, K 2 tog, K to last 3 sts, K 2 tog, K 1.
Next row: Purl.
Next row: K 1, K 2 tog, K to last 3 sts, K 2 tog, K 1. (8sts) Bind off.
Fold ear in half with wrong side together. Over sew row ends. Oversew cast on and bound off stitches together. Sew ear to top of bear’s head. Repeat for second ear.
Muzzle: With brown cast on 12 stitches. First row: Purl
Next row: Inc in first st, K to last st, inc in last st.
Next row: Purl
Next row: Inc in first st, K to last st, inc in last st. (16 sts) Starting with a purl row, stockinette 3 rows.
Next row: K 2 tog, K to last 2 sts, K 2 tog. Next row: Purl
Next row: K 2 tog, K to last 2 sts, K 2 tog. (12 sts)
Next row: Purl. Bind off.
Center between ears with bottom about 2 rows above increases for head. Sew in place leaving a small gap for stuffing. Stuff firmly and close gap.
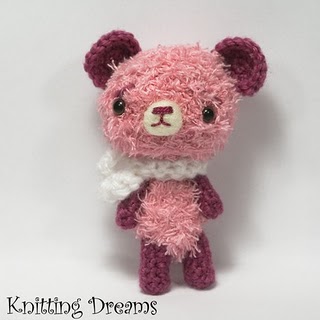
Face: Thread a long darning needle with black yarn. Mark position of eyes with pins. Bring yarn out at one eye position. Put needle through head up 2 rows in a direct line with first position. Bring needle out at first position and pull thread through. You have completed one stitch. Make 2 more in the same way. Move to second eye and finish in the same way.. Satin stitch nose to form a V. Nose is made at the top, center of muzzle. Make mouth with one 1ong stitch coming down from bottom of nose and 2 long stitches at the bottom of the first, one on each side. (See Picture)
Arm: With brown cast on 9 sts. First row: Inc in every st. (18 sts)
Beginning with a purl row, stockinette 17 rows. Bind off. Make second arm in the same way. Stuff arms firmly. Sew to sides of bear at shoulder.
Panties
With white cast on 28 stitches. Stockinette 6 rows.
Next row: K 2 tog, K to last 2 sts, K 2 tog.
Next row: P 2 tog, P to last 2 sts, P 2 tog.
Repeat these 2 rows until you have 2 sts on needle. Starting with a purl row, stockinette 3 rows.
Next row: Inc in first st, K to last st, inc in last st.
Next row: Inc in first st, P to last st, inc in last st.
Repeat these 2 rows until you have 28 sts on needle. Stockinette 6 rows. Bind off. Sew side seams. Put on Bitsy pulling up to waist.
Pinafore
With pink cast on 100. Stockinette 4 rows.
Next row: K 1, (K 2 tog, YO) across row, end YO, K 1.
Starting with a purl row, stockinette 15 rows.
Next row: K 2 tog across row. (50 sts)
Next row: Bind off 20 stitches purlwise. Purl across remaining stitches.
Next row: Bind off 20 sts knitwise. K across remaining 10 sts. These sts are the pinafore bib. Starting with a purl row, stockinette 7 rows. Bind off.
Finishing: Sew back seam leaving 1& 1/4" open at top. Turn up hem along picots and sew in place. With crochet hook, attach pink yarn to the top left corner of back opening with a slip stitch. Ch 1, sc in same st, sc in each bound off stitch of pinafore waistband until you get to bib. Sc in row ends of bib to top corner stitch. Ch 51. Turn and sc in 2nd ch from hook and each remaining ch. Sc in each bound off st of bib to corner st. Leave comer st unworked. Ch 51, turn and sc in 2nd ch from hook and each remaining ch. Sc in comer st. Sc in in the unworked sts of bib and waistband. Sc down one side of back opening and up the other. End with slip stitch in top of first sc. Fasten off. Sew snap to top of back opening. Put on Bitsy and tie ties in a bow behind neck.
Headband
With pink cast on 60 sts. K1, P 1 rib for 3 rows. Bind off in rib. Oversew ends together.
Bow: With pink cast on 6 sts. Stockinette for 12 rows. Bind off. Gather and tie center of piece to make a bow shape. Attach to headband.

reference : knittingpatterncentral

10/02/2553

Felted Purse

Felted Purse


Materials:

2 balls Paton’s Classic Wool Any 100% wool yarn will do. Do not use a superwash wool as it will not felt. Colors matter. Light colors, white, aran, natural do not felt as well as darker colors.

16” circular needle size 10 ½
2 double pointed needles size 10 ½

Purse:

With two strands of yarn held together, cast on 34 stitches. Knit back and forth in garter stitch for 34 rows. Break and finish off one strand of yarn. Now with remaining strand of yarn continue by picking up 16 stitches down short side of piece. Place one of the 3 same color markers on needle. Pick up and knit 34 stitches along long side of piece. Place another of the same color markers on needle. Pick up and knit 16 stitches along remaining short side of piece and place last of the same color markers on needle. Knit across remaining 34 stitches. Place remaining marker. This marker marks not only the corner but the row. From now on you will be knitting in the round. Knit 56 rows.

Next round: *Knit 3, bind off 3, knit 4 (includes stitch on needle after bind off), bind off 3, knit 3 ( includes stitch on needle after bind off) Slip marker.*
**Knit 7, bind off 3, knit to last 10 stitches before marker, bind off 3, knit 7 (includes stitch on needle after bind off). Slip marker.**
Repeat * to * for next short side.
Repeat from ** to ** for remaining long side.
Next round: Knit around casting on 3 stitches over every 3 stitch bind off of previous row. Leave the row marker on your needle, but remove the other markers as you go.
Knit for 8 more rows. Bind off. Weave in ends on wrong side of work.

Handles:

Make 2. Handles are made in 5 stitch I cord. Cast 5 stitches on one of the double pointed needle. Do not turn. Push stitches down to working end of needle. Pull yarn across back of work and knit. Continue in this way, pushing the stitches down to a working position at the end of the needle and pulling the yarn across the back of work. Never turn work but always have the right side facing you. Make each I cord 36” long. Bind off.

Felting:

Put your finished pieces in a pillow slip or net bag. Note: This is highly recommended as it will keep your I cord from tying itself in knots as well as keep lint from clogging your filter. Set washing machine for the smallest load, hot water wash and cold water rinse. Add a bit of detergent. Put the bag in the machine and run through a complete cycle. Some recommend putting towels, jeans or some other heavy items in with piece to be felted. The friction of items rubbing together during the process is suppose to facilitate felting. I have never found this necessary. At the end of the cycle check the purse. If properly felted the fabric should be thick and firm. You should not be able to see the individual knit stitches on the sides of bag. (The ridges of the garter stitch bottom will still be visible.) If purse does not meet those standards return to machine and run through another cycle. This time, however, check the progress every five minutes. When the purse meets your criteria, advance the machine timer to rinse and complete the wash cycle. Remove purse. Begin to shape with your hands. Pull and stretch the wool until you are satisfied with the proportions. (Note: It is not possible to give definitive measurements as felting is not a precise process.) Hold the ends of the I cord and pull, stretching them to be sure they are the same length. Place pieces on a towel away from direct sunlight. Allow pieces to dry thoroughly.

Finishing:

Thread I cord through eyelets. Tie ends on each side in overhand knot. If necessary, adjust knots to insure handles are even. If you have used a yarn that got very fuzzy during the felting process you can trim the fuzzy ends if you wish.

reference : www.knittingpatterncentral.com